A stabilizer bar, also known as an anti-roll bar or sway bar, plays a vital role in your car’s suspension system. It connects the left and right wheels through short links, reducing body roll during cornering and improving overall vehicle stability. Over time, wear, corrosion, and loose fittings can affect its performance — especially if you frequently drive on rough or uneven roads.
Performing regular inspections of your stabilizer bars is one of the simplest yet most effective ways to maintain handling precision and ride safety. In this guide, we’ll explain how to check stabilizer bars and their related components during routine suspension maintenance, what to look for, and when to replace worn parts.
Why Stabilizer Bar Inspections Matter

While stabilizer bars are made from durable steel, their supporting components — bushings, end links, and brackets — are prone to wear and corrosion. A neglected sway bar can lead to:
-
Excessive body roll when turning
-
Clunking or rattling noises from the suspension
-
Uneven tire wear
-
Reduced steering response and comfort
Routine inspection helps detect early signs of wear before they compromise safety or cause damage to other suspension parts.
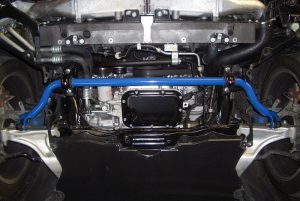
Stabilizer Bar System Overview
A sway bar assembly consists of several parts, each with specific roles in maintaining stability.
| Component | Function | Common Issue |
|---|---|---|
| Stabilizer Bar | Reduces body roll by distributing force between wheels | Rust, bending, or cracks |
| End Links | Connect bar to suspension arms | Loosen, seize, or develop play |
| Bushings | Cushion bar movement and reduce noise | Harden, crack, or squeak |
| Mounting Brackets | Secure bushings and bar to the chassis | Corrosion or loose bolts |
A full inspection should cover all these elements to ensure proper operation.
Tools Needed for Inspection
Before starting, gather the following basic tools and materials:
-
Floor jack and jack stands
-
Lug wrench
-
Flashlight or inspection lamp
-
Torque wrench
-
Pry bar
-
Silicone or lithium grease
-
Safety gloves and goggles
Tip: Always work on level ground, and secure the car safely before going underneath.
Step-by-Step Guide to Inspecting Stabilizer Bars
1. Lift and Secure the Vehicle
Raise the car using a jack and support it on jack stands. Ensure the suspension is unloaded (wheels slightly off the ground) to check for free movement of components.
2. Visual Inspection
Use a flashlight to check the stabilizer bar and its mounts. Look for:
-
Rust or corrosion spots on the metal bar
-
Flaking or missing protective coating
-
Signs of contact with other suspension parts
If the bar shows deep rust or cracks, it should be replaced immediately.
3. Inspect the End Links
End links connect the stabilizer bar to the suspension arms and are crucial for transferring forces.
Check for:
-
Play or looseness in the joints (use a pry bar to test movement)
-
Torn rubber boots or leaking grease in ball-joint-style links
-
Corrosion on bolts or threads
Loose or noisy end links often cause the “clunking” sound over bumps.
4. Examine Bushings
Bushings isolate vibrations and allow controlled sway bar movement. Over time, rubber can harden, shrink, or crack.
Bushing Inspection Checklist:
-
Look for visible cracks or deformation
-
Check for movement between the bar and bushing (excessive play)
-
Listen for squeaking noises while rocking the vehicle side to side
If the bushings are dry or noisy, apply a thin layer of silicone grease. Severely worn bushings should be replaced.
5. Check Mounting Brackets and Bolts
Mounting brackets hold the sway bar in place and are exposed to road debris, salt, and moisture.
-
Tighten all bolts to manufacturer torque specifications
-
Clean rusted areas and apply anti-corrosion spray
-
Replace brackets that show signs of structural weakness or distortion
6. Test Bar Movement
Manually push or pull the sway bar to ensure it moves smoothly but not excessively. Any grinding or uneven motion indicates worn bushings or misalignment.
Inspection Frequency and Maintenance Table
| Maintenance Task | Purpose | Recommended Interval |
|---|---|---|
| Visual inspection of stabilizer bar | Detect rust, cracks, and damage | Every 10,000–15,000 km |
| Check end links and bushings | Identify wear or looseness | Every 20,000 km |
| Torque fasteners | Prevent rattling and misalignment | At every suspension service |
| Lubricate bushings | Reduce friction and squeaks | Twice a year |
| Replace worn components | Maintain optimal handling | As needed |
Common Signs of Stabilizer Bar Problems
Watch for these warning indicators between inspections:
-
Rattling or clunking when driving over bumps
-
Excessive body roll when cornering
-
Uneven steering feel or poor return-to-center
-
Visible rust or sagging bar under the chassis
-
Worn tire edges, indicating instability
If you experience any of these symptoms, it’s time to perform a detailed inspection or replace the affected parts.
When to Replace Stabilizer Components
Even with regular care, sway bar parts wear out over time. Replacement intervals depend on driving conditions and climate, but typically:
-
Bushings: every 50,000–80,000 km
-
End Links: every 60,000–100,000 km
-
Stabilizer Bar: only when bent, cracked, or heavily corroded
When replacement is due, always use components designed specifically for your vehicle. You can Buy Stabilizer & Components online to ensure quality, fitment, and durability.
Preventive Care Tips for Longer Component Life
To keep your stabilizer system performing optimally:
-
Clean the undercarriage regularly – especially in winter to remove salt.
-
Apply anti-rust spray on exposed metal parts twice a year.
-
Avoid over-tightening bolts, which can crush bushings.
-
Inspect after rough off-road trips or pothole impacts.
-
Replace parts in pairs (left and right) to maintain balance.
Table: Comparison of Bushing Types
| Bushing Material | Advantages | Drawbacks | Best Use Case |
|---|---|---|---|
| Rubber | Smooth ride, absorbs noise | Softens over time, cracks in cold | Daily driving |
| Polyurethane | Durable, resists heat and oil | Transmits more vibration | Performance or off-road use |
| Synthetic | High flexibility, low noise | Costlier | All-weather driving |
Choosing the right bushing type based on your driving environment improves both comfort and durability.
Final Check: Post-Inspection Road Test
After completing your inspection and tightening all bolts:
-
Lower the vehicle and take a short drive.
-
Listen for noises over bumps and assess cornering stability.
-
Recheck bolts and components after 50–100 km to ensure they remain secure.
Conclusion
Regular stabilizer bar inspections are essential for maintaining suspension health, ride comfort, and road safety. A few minutes spent during each service can prevent costly repairs and ensure your car handles predictably under all driving conditions.
By inspecting bushings, end links, and mounting points, you’ll keep your stabilizer system working efficiently and extend the life of your suspension.
When replacement parts are needed, don’t compromise on quality — you can easily Buy Stabilizer & Components online for reliable, precision-engineered parts that restore handling performance and safety.