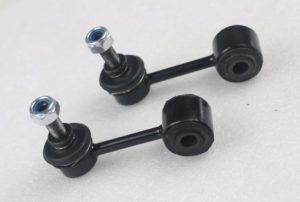
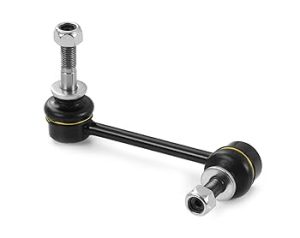
When it comes to vehicle suspension, few components are as crucial to handling and safety as the stabilizer bar (or sway bar) and its associated hardware. While most car owners focus on part replacement, one vital detail is often overlooked — proper torque tightening of stabilizer bar links and mounts. Under- or over-tightening these bolts can severely compromise suspension performance, cause premature wear, and even lead to dangerous driving conditions.
In this article, we explore why torque specs matter, the consequences of improper tightening, how to do it right, and how to spot signs of issues.
What Are Stabilizer Bar Links and Mounts?

The stabilizer bar is a metal rod that connects the suspension systems on opposite sides of the car. It’s supported by mounting brackets (with bushings) and connected to the control arms or struts via stabilizer (sway bar) links.
These connections are critical because they:
-
Transfer suspension movement side-to-side
-
Reduce body roll during cornering
-
Improve overall vehicle balance
Why Torque Specifications Matter
Every bolt in your vehicle is designed to be tightened to a specific torque value—a unit that measures the twisting force. For stabilizer bars and links, correct torque:
-
Ensures proper clamping force
-
Prevents component movement or slippage
-
Avoids thread stripping or bolt failure
-
Maintains suspension geometry
Too Loose = Noise, loss of function, and rapid wear
Too Tight = Damaged threads, snapped bolts, crushed bushings
Typical Torque Specs for Stabilizer Bar Components
| Component | Typical Torque Range (Nm) |
|---|---|
| Stabilizer Bar Mount Bolts | 35 – 55 Nm |
| Stabilizer Link to Bar | 45 – 70 Nm |
| Stabilizer Link to Strut | 45 – 75 Nm |
| Rear Stabilizer Link Bolts | 30 – 50 Nm |
Always refer to your vehicle’s factory service manual for exact specifications, as values vary by make/model.
How to Tighten Stabilizer Links and Mounts Properly
Step-by-Step Process:
-
Position Vehicle Safely
-
Lift and secure the car using jack stands or a lift.
-
Ensure the suspension is in a neutral position (usually under load).
-
-
Use the Right Tools
-
Torque wrench calibrated in Nm (or lb-ft)
-
Box wrench or Allen key (to hold the ball stud if needed)
-
-
Install Bushings and Mounts
-
Position rubber/polyurethane bushings correctly.
-
Avoid lubricants unless specified by the manufacturer.
-
-
Tighten Bolts to Spec
-
Begin by tightening bolts by hand to seat threads.
-
Use a torque wrench to apply the exact recommended torque.
-
Tighten both sides evenly to avoid tension misalignment.
-
-
Double-Check
-
Inspect all fasteners after 100–200 km of driving for loosening.
-
Common Mistakes and Their Consequences
| Mistake | Consequence |
|---|---|
| Over-tightening link bolts | Crushed bushings, broken stud or bolt |
| Under-tightening mount bolts | Clunking sounds, sway bar movement |
| Misaligned bushings | Uneven wear, squeaking, misdirected force |
| Not torquing under load | Pre-stressed bushings, poor ride quality |
| Mixing old and new parts | Inconsistent fitment and reduced performance |
Signs of Improperly Tightened Stabilizer Links
Knowing what to look for can help you detect an issue early. Watch for:
Warning Signs:
-
Clunking or knocking sounds over bumps or during turns
-
Uneven body roll
-
Loose or wandering steering feel
-
Visible bushing damage or displacement
-
Corrosion or thread damage on bolts
When to Re-Torque Stabilizer Bar Components

Even when installed correctly, stabilizer bar fasteners can loosen over time due to vibration, driving conditions, or bushing compression.
Recommended Re-Torque Intervals:
-
After first 200 km post-installation
-
Every 20,000–30,000 km during routine suspension inspection
-
After track use, off-roading, or heavy load driving
Tools and Products That Help
For best results, you’ll need tools and quality parts designed for accurate torque and longevity.
Recommended Tools:
-
Digital or click-style torque wrench (3–90 Nm range)
-
Allen/hex keys (for link ball studs)
-
Threadlocker (as specified)
Maintenance Tip:
Use anti-seize compound on bolt threads only if recommended. Some torque values are dry-spec, and lubricants can throw off torque readings.
Upgrade Options and Components
Upgrading to performance stabilizer bars, adjustable links, and high-quality bushings improves handling and longevity—especially for enthusiasts or heavy-duty applications.
| Component Type | Upgrade Benefit |
|---|---|
| Polyurethane Bushings | Longer life, firmer feel |
| Adjustable Sway Bar Links | Fine-tuned suspension balance |
| Heavy-Duty Mounting Brackets | Better support under aggressive driving |
Buy Stabilizer & Components online
Conclusion
When it comes to stabilizer bars and their components, torque isn’t just a number — it’s a safety and performance factor. Proper torque ensures your suspension system operates at peak efficiency, keeping your vehicle stable during every turn and every bump.
Don’t let a simple oversight compromise your vehicle’s handling. Invest in the right tools, follow manufacturer specs, and inspect regularly to keep your sway bar system strong and secure.