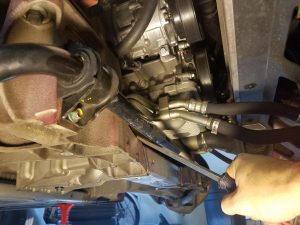
A vehicle’s suspension system is the unsung hero behind smooth rides and safe handling. While shock absorbers and springs often get the spotlight, the stabilizer bar — also known as the sway bar or anti-roll bar — plays a critical role in minimizing body roll and enhancing cornering stability. During routine suspension maintenance, inspecting the stabilizer bar and its components is essential to prevent premature wear and preserve your vehicle’s performance.
This article provides a complete guide on how to inspect stabilizer bars, what to look for, and when to replace critical components.

Why Stabilizer Bar Inspections Matter
The stabilizer bar connects the left and right sides of your suspension to control the vehicle’s roll during turns. It keeps your car stable, particularly in sharp corners or during evasive maneuvers.
Neglecting stabilizer bar maintenance can result in:
-
Poor handling and reduced cornering performance
-
Increased risk of rollover during sharp turns
-
Clunking or rattling noises over bumps
-
Premature wear of suspension components
Stabilizer Bar System: Components to Inspect
Before jumping into the inspection steps, it’s important to understand the key elements of the stabilizer bar system:
| Component | Function |
|---|---|
| Stabilizer Bar | Transfers force between suspension sides to reduce roll |
| Bushings | Cushions the bar and absorbs vibration |
| End Links | Connects the bar to the suspension arms or struts |
| Mounting Brackets | Secures the bar and bushings to the vehicle frame |
Each of these components must be in good condition for the stabilizer system to function effectively.
Tools You’ll Need
-
Car jack and jack stands
-
Flashlight or inspection lamp
-
Pry bar or screwdriver
-
Wrench set
-
Gloves and safety glasses
Step-by-Step: How to Inspect Stabilizer Bars
1. Lift the Vehicle Safely
-
Use a car jack to lift the front or rear of the vehicle (depending on the stabilizer bar you want to inspect).
-
Place jack stands securely under the frame.
-
Ensure the vehicle is on a level surface before working underneath.
2. Visually Inspect the Stabilizer Bar
Look for:
-
Cracks or bends in the bar
-
Corrosion or rust, especially at bends or near bushings
-
Any signs of impact damage
If the bar is visibly bent or corroded, it should be replaced.
3. Check the Bushings
Bushings secure the stabilizer bar to the vehicle’s chassis. Over time, rubber or polyurethane bushings can wear out or dry rot.
| Signs of Worn Bushings | What It Means |
|---|---|
| Cracked or split rubber | Material degradation |
| Excessive movement | Poor fit or bushing fatigue |
| Metal-to-metal contact | Missing or collapsed bushings |
Test tip: Use a pry bar to gently push the stabilizer bar near the bushing. It should have minimal movement. If it slides excessively, the bushing is likely worn.
4. Inspect End Links
End links connect the stabilizer bar to the suspension strut or control arm. They are critical to sway bar function.
Check for:
-
Looseness or play
-
Broken or missing bolts
-
Worn ball joints (if equipped)
-
Bent or broken rods
Wiggle Test: Grasp the end link and try to move it. Any clunking, looseness, or rattling indicates a bad end link.
5. Listen for Noises During a Test Drive
If you hear any of the following when driving over bumps or during turns, the stabilizer bar system may be worn:
-
Clunking: Loose end links or bushings
-
Creaking: Dry or cracked bushings
-
Rattling: Detached or broken components
How Often Should You Inspect Stabilizer Bars?
| Vehicle Use | Inspection Frequency |
|---|---|
| Daily commuting | Every 20,000–30,000 km |
| Towing or heavy loads | Every 10,000–15,000 km |
| Off-roading or rough roads | After every major trail trip |
| During other suspension work | Every time |
When to Replace Stabilizer Components
You should consider replacing stabilizer bar parts if:
-
Bushings are cracked, soft, or missing
-
End links rattle or show visible damage
-
Stabilizer bar is bent, corroded, or worn
-
You notice sudden changes in cornering or handling performance
Stabilizer Bar Maintenance Tips
-
Use High-Quality Replacement Parts: Opt for OEM or high-performance aftermarket bushings and links.
-
Grease Polyurethane Bushings: If using polyurethane, apply the proper lubricant to avoid squeaking.
-
Inspect During Tire Rotations: A great opportunity to catch problems early.
-
Upgrade If Necessary: If you carry heavy loads or tow regularly, a thicker stabilizer bar can improve safety and handling.
-
Avoid Harsh Chemicals: When cleaning under the vehicle, avoid solvents that degrade rubber bushings.
Upgrading or Replacing Stabilizer Components?

If your inspection reveals wear, or if you want to upgrade your vehicle’s suspension system for improved stability, high-quality stabilizer components are readily available.
Buy Stabilizer & Components online to find a full selection of stabilizer bars, bushings, end links, and mounting kits for all major vehicle types.
Conclusion
Routine suspension checks should always include a detailed inspection of the stabilizer bar and its related components. Keeping these parts in top condition ensures safer driving, better handling, and longer-lasting suspension performance. Whether you’re a weekend mechanic or a daily commuter, don’t overlook the sway bar during your next undercar inspection — it could be the difference between confident control and unpredictable handling.
If you’re noticing unusual noises or decreased stability, it’s time to act. Early detection saves money, time, and keeps your vehicle driving as it should.