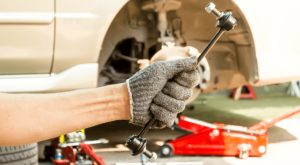
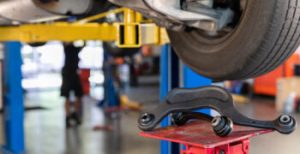
The stabilizer bar (also known as an anti-roll bar or sway bar) and its end links play a crucial role in keeping your vehicle stable during turns, reducing body roll, and ensuring better handling. While these components are relatively straightforward in design, mistakes during replacement are surprisingly common. Such errors can lead not only to poor performance but also to safety risks and premature wear of suspension parts.
In this article, we’ll go over the top 5 mistakes when replacing a stabilizer bar or end links, how they affect your vehicle, and how to avoid them.

Why the Stabilizer Bar and End Links Matter
The stabilizer bar connects opposite wheels through short end links, helping distribute weight and maintain stability when cornering. Without it, your vehicle would experience excessive body roll, poor handling, and increased tire wear. Replacing a worn stabilizer bar or end links restores:
-
Better cornering stability
-
Reduced noise and vibration
-
Improved safety and handling
-
Extended suspension component life
Mistake 1: Using the Wrong Replacement Parts
One of the most common errors is installing incompatible parts. Drivers sometimes pick end links that are too short or too long, or stabilizer bars that don’t match factory specifications.
Consequences:
-
Poor fitment
-
Noise and clunking sounds
-
Reduced handling performance
-
Faster wear of bushings and joints
How to Avoid:
-
Check your vehicle’s service manual for correct part numbers.
-
Measure the old stabilizer bar and links before ordering replacements.
-
Purchase from trusted suppliers — you can Buy Stabilizer & Components online for guaranteed compatibility.
Mistake 2: Reusing Old Bushings and Hardware
Some DIY mechanics replace the stabilizer bar or links but reuse old rubber bushings, nuts, or bolts. This is a shortcut that leads to problems.
Consequences:
-
Squeaking or knocking noises
-
Reduced effectiveness of the new stabilizer bar
-
Premature failure of the entire setup
How to Avoid:
-
Always replace bushings and hardware along with the bar or links.
-
Use high-quality rubber or polyurethane bushings for longer service life.
Mistake 3: Incorrect Torque Application
Tightening bolts either too loosely or too tightly can cause major issues. Under-torqued bolts can loosen over time, while over-torquing can damage threads or bushings.
Consequences:
-
Looseness and clunking noises
-
Component failure under load
-
Stripped threads or broken bolts
How to Avoid:
-
Use a calibrated torque wrench.
-
Follow manufacturer’s torque specifications from the service manual.
Mistake 4: Forgetting Wheel Alignment After Replacement
Replacing stabilizer components can change suspension geometry slightly, especially if other parts like control arms or bushings are disturbed during installation. Many drivers skip alignment afterward.
Consequences:
-
Uneven tire wear
-
Vehicle pulling to one side
-
Compromised steering response
How to Avoid:
-
Schedule a full alignment after replacing suspension components.
-
Check steering response during the first test drive.
Mistake 5: Mixing Old and New Parts
Installing just one new end link while leaving the other old, or replacing the stabilizer bar without changing worn bushings, leads to imbalance. Suspension systems rely on pairs of components working together.
Consequences:
-
Uneven handling
-
Faster wear of old parts
-
Safety risks during cornering
How to Avoid:
-
Always replace parts in pairs (both end links, both bushings, etc.).
-
Inspect all surrounding suspension components before finishing the job.
Table: Top Mistakes and Prevention
| Mistake | Consequence | Prevention Tip |
|---|---|---|
| Wrong replacement parts | Poor fit, noise, reduced handling | Verify part numbers, order correct size |
| Reusing old bushings/hardware | Noise, reduced stability, wear | Replace bushings, use quality components |
| Incorrect torque | Looseness, failure, stripped bolts | Use torque wrench, follow specs |
| Skipping alignment | Uneven tire wear, poor steering | Do alignment after replacement |
| Mixing old and new parts | Imbalanced handling, faster wear | Replace parts in pairs |
Signs of Poor Replacement Work
If you’ve recently replaced a stabilizer bar or end links and notice any of these symptoms, an installation mistake may have occurred:
-
Persistent clunking noises over bumps
-
Uneven handling or poor cornering
-
Excessive body roll
-
Vehicle pulling to one side
-
Premature tire wear
Best Practices for Correct Replacement

To ensure your stabilizer bar and end links are replaced correctly:
-
Prepare Properly
-
Gather tools: torque wrench, sockets, penetrating oil.
-
Have new bushings and hardware on hand.
-
-
Follow Manufacturer Guidelines
-
Use OEM specifications for torque and orientation.
-
-
Replace in Pairs
-
Both left and right end links should be new.
-
-
Inspect Related Parts
-
Check control arms, strut mounts, and bushings.
-
-
Test and Align
-
Perform a road test and then get a full alignment.
-
Tools You’ll Need
-
Torque wrench
-
Socket and wrench set
-
Jack and jack stands
-
Penetrating oil (for rusted bolts)
-
New bushings and mounting hardware
Final Thoughts
Replacing a stabilizer bar or end links may seem like a simple task, but small mistakes can have a big impact on your car’s performance and safety. The most common errors come from rushing the job, reusing old parts, or neglecting alignment. By following correct installation practices and replacing all necessary components together, you can ensure smoother handling and safer driving.
For guaranteed fitment and quality, you can always Buy Stabilizer & Components online and make sure your suspension system stays reliable for years to come.